Making a quilt – adding the edge and finishing
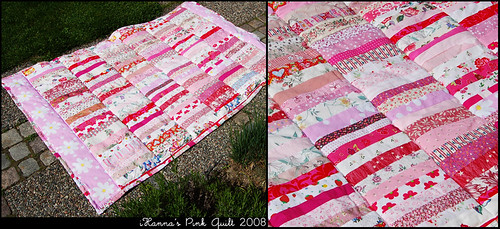
It is finished! My pink quilt is finished!
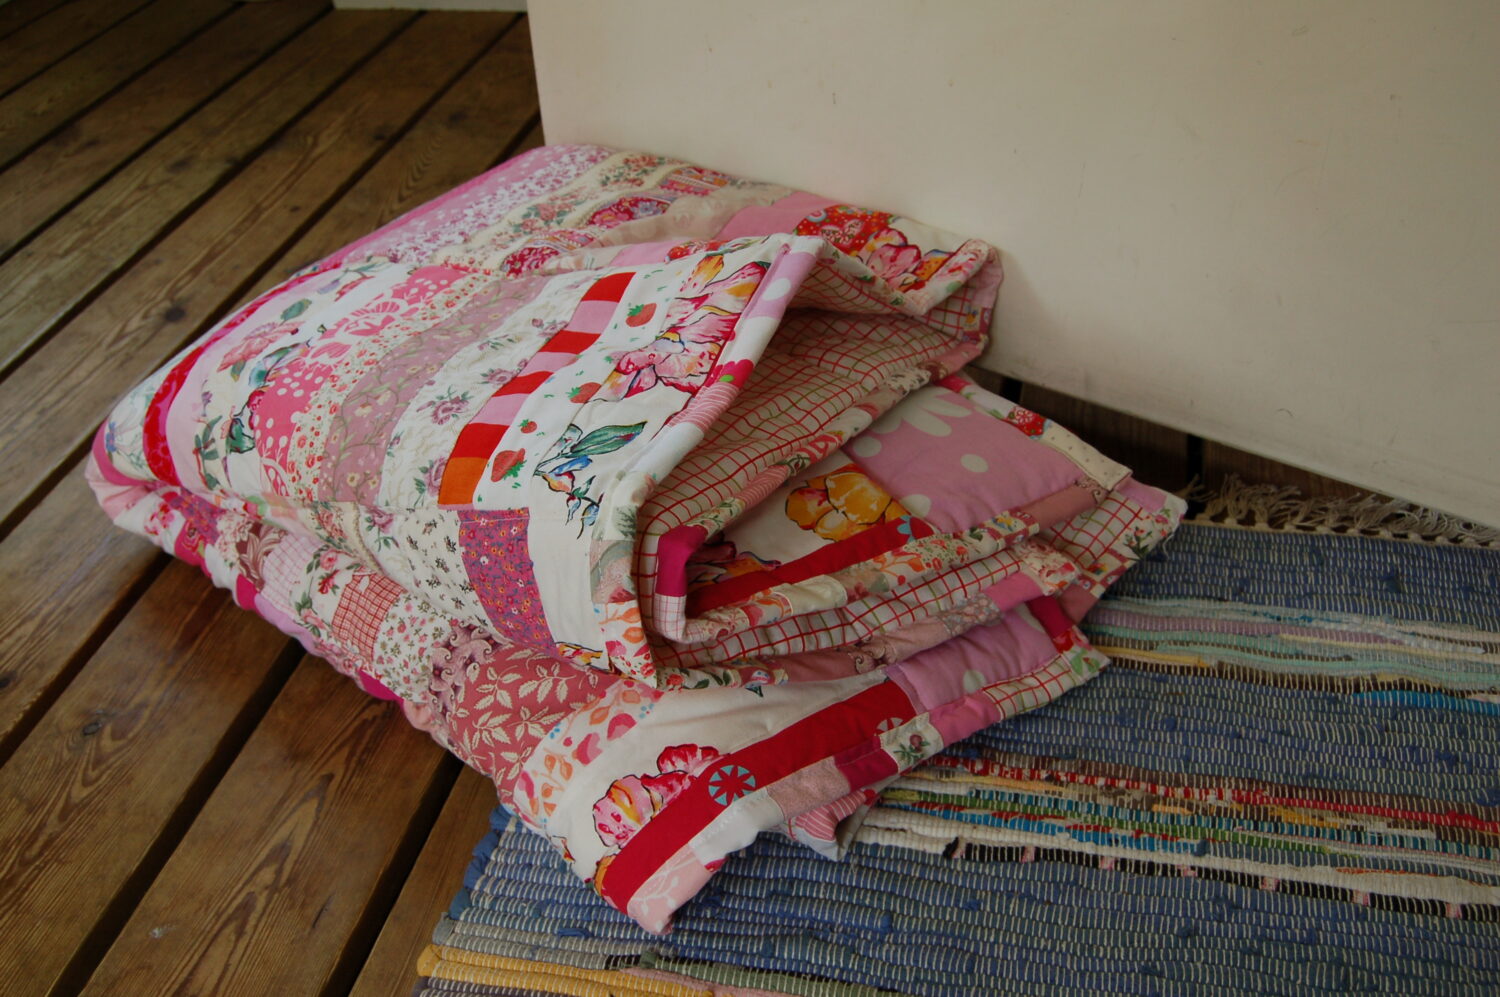
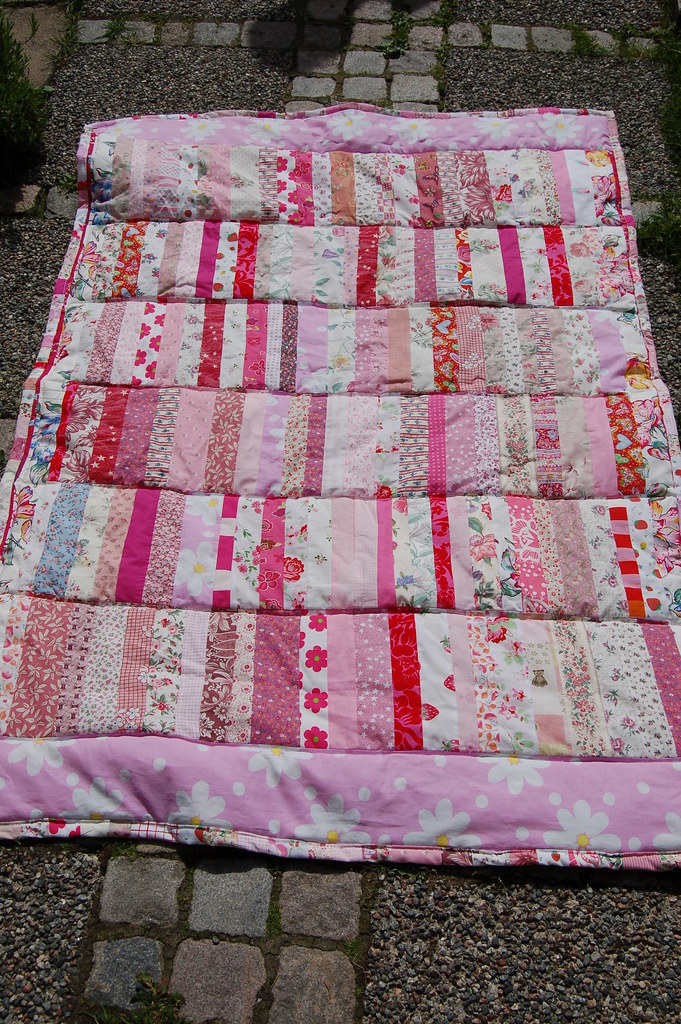
It’s a bundle of love when it is folded like that, and spread out on the floor it is a feast for the eye. I think I’ve used almost every pink fabric that we have and I love love love it!
This is the third and last part of The making of a Quilt, a bit of a tutorial and a bit of documenting the process.
The other parts in this series are
1) The making of a quilt – Starting is easy
2) The making of a quilt – Sewing it together
plus some thoughts in post 3) while having a drink at the veranda
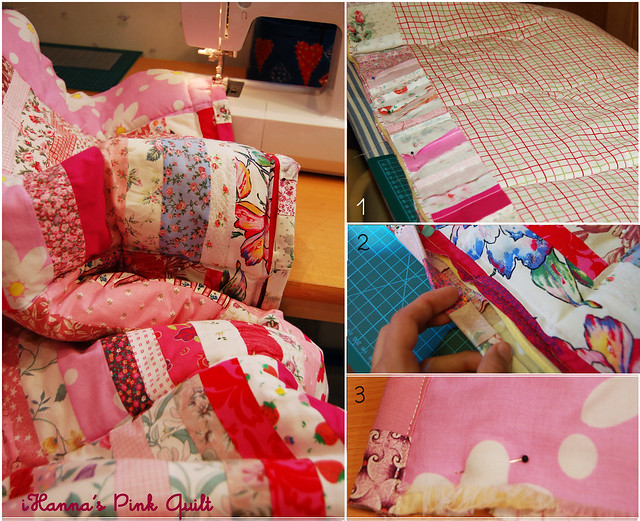
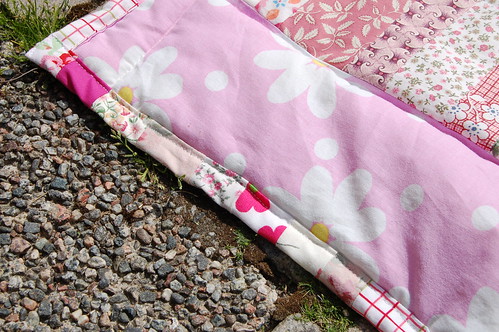
Quilting the layers is a bit of a task, but once that is finished all you have to do is add an edge to the quilt and you’re finished. This is the part that I think many quilters procrastinate. I know I did for a while, and then I decided to sew some of the left over stripes together and cut them to 7 cm with. I like this edge, it fits the rest of the quilt well. As seen on the photo above;
1) take the long (7 cm wide) stripe and pin it to the backside of the quilt. Lay the pieces of fabric on a flat surface and line up the edges of the fabric. Then sew it in place. Do this on both long sides. (Do not sew over pins!)
2) Turn the whole work over so that the front is facing upwards. Fold the fastened stripe piece over the quilted layers and fold in the raw edge in and pin all the way. Measure if you need to check that it is even before you sew a straight seam on your sewing machine. I use white or off-white thread.
3) The long-side is finished and the short-side is still “raw” in this image as you can see. You do this in the same way as above only you tuck in the ends and sew them in place too. It’s a handful maneuvering this in the sewing machine, but it works!
The edge is finished – and then the quilt is finished! iHanna is happy.

I’ve already seen a couple of movies in the TV-sofa under this cozy blanket, and all I can say is (again) I love it! I think you should start right now to make a cozy blanket for yourself. Yes, it’s a quite a bit of work, but it’s worth it! I like the weight of mine, and the newness it has to it. I will love to see it age and if you come back in 30 years to this blog, remind me to post another photo so you can see how it ages…
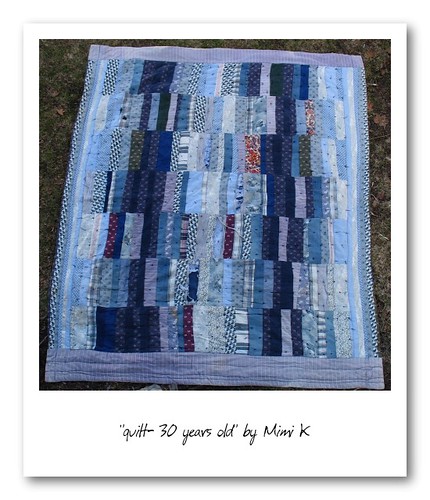 I was inspired by dollmaker Mimi Kirchner’s handmade quilt from 1978 in blue. Thank you Mimi for posting it and allowing me (and mom) to be inspired by it! I just love how simple yet fascinating this quilt is, and I’m glad I made one for myself. I will post photos of my mothers project too as soon as I’ve taken some photos. She made a similar alongside with me, and hers looks more like Mimi’s since it is blue too.
Have fun making a quilt of your own!


Oh my goodness, that quilt is gorgeous! I too absolutely love pink but as I have 1 husband & 2 sons there’s not an awful lot of it in our house!! I have recently started making my first quilt (blue, natch!) but your post has really made me want to make a lovely pink one just for me!
Yeah, everyone should have a pink quilt! Go girl!
:-)
It is absolutely gorgeous! One of a kind. You are so talented and patient! If I had more space to work (and a sewing machine) I think I would try doing one. Again, so beautiful! And I bet Smilla loves it too.
*hugs*
Sophie
How very beautiful. I’m glad to know I can look to your blog for advice when I finally tackle a quilt of my own. :o)
I love this quilt! I now have plans to make one of my own. What colour, what colour?
This is an absolutely divine quilt. I love it.
It looks so cozy! This blanket and a bowl of strawberries, what else a girl needs?
BTW, I was cheering for Sweden last night in the Euro 2008! *^v^*
Vackert Vackert!
Wow! I love this quilt – even at the end of a brutal heat wave I want to curl up with it!
Your quilt is delightful ! You have a real artist’s eye for quilting – it really looks like a piece of art with the added bonus of being so cozy and sweet! I so admire your talent ! Sewing makes me very frustrated so no fabric quilts for me – paper might work but not so cozy to watch movies under !
Cheers on a beautiful job,
Kim
Wow Hanna! Va snygg den blev! Superduperfin.
Oh, what a lovely quilt. What an effort you must have put into it. I understand you love it!
It came out beautifully! I am thrilled to know I could inspire such a project :-)
There is nothing like snuggling in a handmade quilt and watching a movie…it makes everything better! I love all the different fabric combinations as well…beautiful job Hanna!
Wow! It turned out so great! I just got my sewing machine fixed and am slowly working back into it so this is inspiring for me to finish my quilt I was working on. :)
I love (really love) this quilt. I can tell because generally, I don’t like pink, but I think this is quite lovely. It’s so very cheerful, if it were mine I think it would bring a smile to my face every time I saw it.
you are so inspiring! what a wonderful piece to have and enjoy. love the pink colors. Thank you for the tutorial too. finishing a quilt is the hardest part, at least for me it is!
I love it it’s so beautiful so pretty and so pink!
SO PRETTY!
This quilt will bring you so much joy!