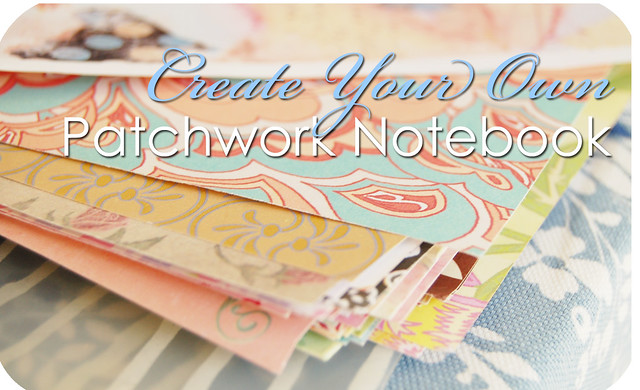
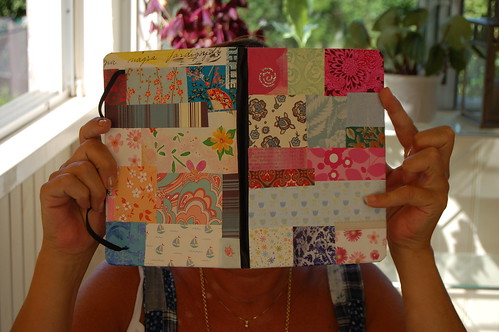
How to make a Paper Patchwork Notebook Cover
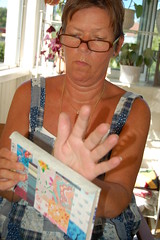
It’s time to finally write this tutorial about how you can turn any ordinary notebook you’ve got into a colorful patchwork with any papers you’ve got at home! It was my mom who got me started, and that is quite unusual as she will knit or sew anything but almost never do any papercrafting. But when she started covering her newly bought notebooks I was inspired and had to do one of the two she gave me too!

The notebooks we used are similar to Moleskine plain notebooks, but much cheaper! Yay to that! All you need is a notebook with a cover you don’t enjoy, a glue stick, some varnish (decoupage glue, glossy medium or similar) and your stack of colorful papers! All set?
Let’s get started!

♥ Spread out your papers and pick only the ones that you really love love love! This will ensure that your notebook will get a cover that is inspiring and special to you. You can use any papers that you fancy. We used mulberry papers, wrapping paper, my own decorated papers, scrapbook sheets, gift bags etc.
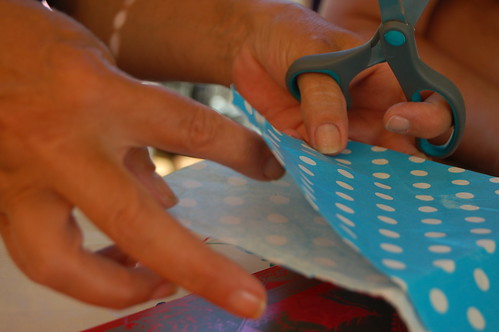
One of my favorite gift wrap papers is sky blue with white dots. I collect beautiful papers at birthday parties and other events but also buy a roll or two when I find one I particularly love.

Start with the edges and cut squares and rectangles as big as you want them. I chose to only use soft papers for the edges because these were easy to bend around to the inside of the cover. Scrapbooking paper is a bit too hard for that, but wrapping paper and Japanese prints are great. Glue each piece a bit overlapping the next one and bend a few centimeters around the edge!
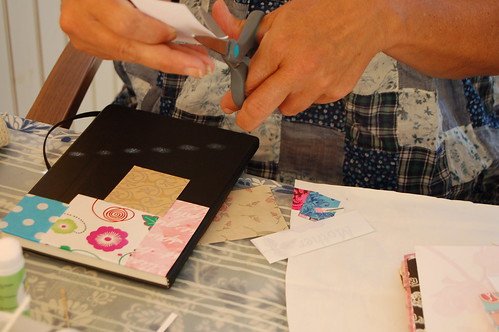
Keep cutting and gluing down papers! Cover the back entierly with glue (I use a glue stick but acrylic medium will work fine too) and press out the air bubbles when you adhere it to the books cover. It might bubble again later but once dry it should smooth out.
 The spine is covered by one long strip of the softer kind of paper. The spine piece should cover up the patchworks edge on the front and back and make the book look rather professional! Cut off the strip close to the spine’s top and bottom and then varnish the whole cover one or two times (depending on how much you need to protect it from usage)!
Leave to dry before you close it or start using it.
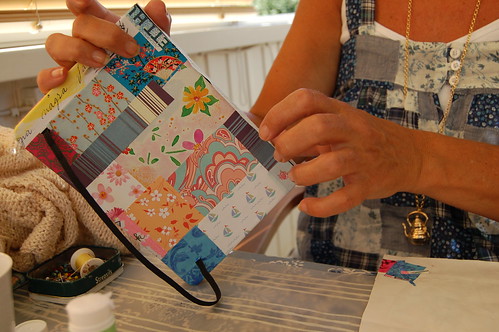
Mom’s book turned out lovely and has that summer feeling to it. We had a great crafting day with paper, glue, coffee and each other!
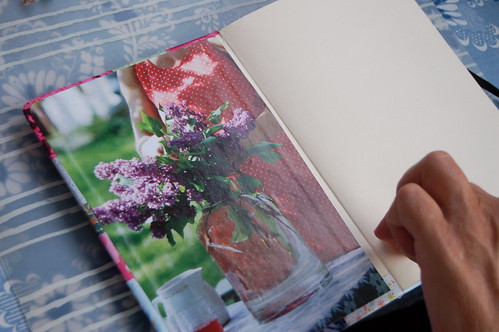
What to do on the inside of the cover?
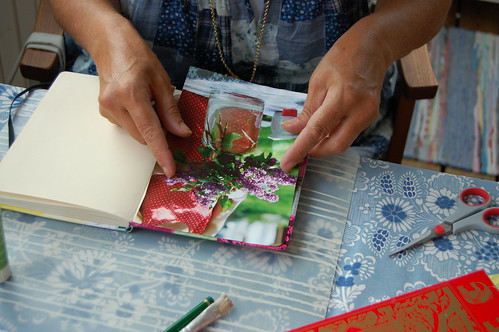
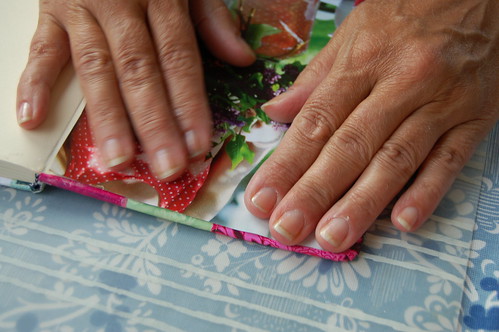
You can leave the inside as it is or glue a big piece of paper there for decoration. Mom put a magazine image on the inside of her notebook cover.
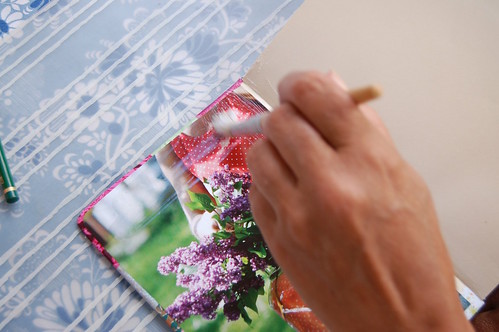
If your notebooks will be put in your handbag or be handled a lot I think it’s a good idea to use that varnish and add one or two coats of it on top the paper patchwork. This will protect the papers as well as make them stick better.
I hope you enjoyed this tutorial on how to make your own Paper Patchwork Notebook cover?
I think the paper patchwork look is lots of fun. I was inspired to do a few of my daily art cards covered with these paper squares, and you can use this technique on canvas, on photo albums, boxes, inside your art journal or to make a big collage for the wall! Imagine a postcard with paper patchwork? I’ve seen furniture and doors covered in beautiful papers – it’s magic and very cool.
Let me know what you do, I’d love to see your results!
I will show some more photos of our patchwork notebooks tomorrow for your inspiration – this post is full!
Related Posts

59 Responses
-
Pingback: Yummy book covers | iHanna's Blog
That looks amazing Hanna :) I will try that some day.
Thanks so much for sharing this, it has inspired me to get to creating!
Great idea! Thank you for the clear tutorial. *^v^*
Wow, I saw these on flickr and instantly added them.. these are such a great idea and I can feel the sympathy you had previously not wanting to edit a nice old cover but these are just gorgeous!
Keep up the great work!
Oh, what a lovely idea! Thanks for sharing.
what a wonderful idea! thanks for the tutorial!
Yay…I love collage!!!
Hooray! thank you for sharing your lovely tutorial! you’re fabulous!
FANTASTIC!! Thanks for sharing. All those yummy colors!
Great tutorial and so many lovely papers you have used.
iHanna,
I love your little tutorial. Using wrapping paper or Origami paper is a great idea. I am going to link to this on my blog. Its great. Thanks for sharing.
Kate
Great tutorial, Hanna! I’m definitely saving this one. Thank you.
Thank you for your tutorial! I visit your blog everyday and now I want to ask you if you mind if I put your tutorial on a Dutch blog where we show all the dutch scrappers and stampers new discoveries?
Sorry if my English is not so well!
you are a constant source of inspiration…thank you for some great ideas :)
I love it. I can’t wait to try it. I have the largest collection of journals. I can’t stop collecting them. Every time I go into Border’s (American Bookstore) I walk out with a new journal.
I have a large pile of paper I can use too. Thanks for inspiring once again.
I can not believe it! I wrote a tutorial for the exact same thing!! It will be posted in my friend’s online magazine when it comes out. haha! I’ll let you know. (My method is slightly different…)
Oh my – thanks for sharing this and perfect timing. I am at home with my daughter who is getting over being sick. I was feeling crafty but tools and toddlers don’t go well together – but this project is one I can do today while she plays!
?h va vackert!!
Jag vill ocks?! Jag tror jag m?ste nu p? direkten :)
Your patchwork notebook is extra-lovely! Great patterns…thanks for sharing the awesome tutorial!
I LOVE your blog — I only just discovered it a few weeks ago, and have been back every day since. I’m glad you enjoyed the article in Kira’s Page by Page zine — I still haven’t received my copy and am just about rabid to see it — it’s my very first published writing!
Can’t wait to see what you do next!
DONE!
Thanks for your tutorial, Hanna. I’m happy with my new, old planner.
Some problems though need a bit of tweaking.
Here you can see the result. As in this blog you can click on the pictures to enlarge them if wanted.
http://t-tally.blogspot.com/2008/09/my-new-old-moleskine-planner.html
Hanna, What are and where do you find the cheaper version of the moleskein books. I love them but they are a little pricey.
Hanane
What a fun idea, I can imagine doing this with my grandkids.
This is lovely–I’ll definitely try it.
What a cool idea. I think I know what I will be doing this weekend!
Okay, that is a MUST DO for this weekend – so happy I’ll have more time for crafts with the rain coming. I love this – thanks for sharing!!
Love, love, love. I have a well documented addiction to notebooks, but I always feel like they need something… more…
Can’t wait to try this!
it is wonderful. Thank you!
Just wanted to let you know I saw this post was mentionned on Whip Up so congratulations!
http://whipup.net/2008/10/01/how-to-paper-patchwork-notebook-cover/
*hugs*
Sophie
Thanks again for all your wonderful comments! Please let me know if you post pictures of your own book somewhere so I can have a a look and be inspired back! :-)
Hanane,
the “cheaper Moleskine” are not as cool as the real ones, these didn’t even have an extra pocket but I like them anyway. Found in a store called jula here in Sweden… hehe.
oh I heart this tutorial and your site!
I cannot wait to try this :)
Hi! I’m over from How About Orange? and wanted to say I *love* this idea! I’ll link to you if I ever get it up on my blog. Thanks for the inspiration!!
Love it! I am linking to your amazing project from my Christmas workshop blog posts. May I add a photo of the journal?
I heart this tutorial. I’ve been itching to start an art journal and I think this is a great way to start it, with the cover! I am still collecting my papers for getting started, but I will post (or put a link at least) once I get it done and started. I might mess around with a trial run in the next week or so, I hope! Thanks for the great how-to and inspiration. :)
Oh my gosh! What a fun tutorial! I love love altering composition notebooks (mainly because you can get them very cheap at Target or Wal-mart after school starts for the year) so I stock up. What a great way to use up patterned paper scraps and gift wrapping paper. Love how your Mom used a picture from a magazine to cover the inside. The notebook came out very pretty. Thanks for sharing! Will have to try this after the holidays!
– Alma =)
This was a fun a useful tutorial! Thanks!
Stacy
I am REALLY coveting your mother’s tea kettle necklace. WHERE did she get it???
Jill, you’re not the first to ask about the necklace… but it’s bought a long time ago in a store in Sweden so I don’t think you’ll be able to hunt one like it down. Sorry and thanks for asking.
came upon this in my love for patchwork. Love the idea and was so distracted by your pics because I LOVE your patchwork SHIRT! ha ha
I loved reading this post and can’t wait to try out the ideas. I’m almost ready to begin a new journal. I have a lot of scrapbooking paper and a glue stick. In the past I have covered my journals with the paper and topped it with a self-sticking laminated sheet. I’ve never tried it in patchwork and I can’t wait! In fact I may do it tonight. Thanks for sharing!
Beautiful! My sister did such work in the early 1990s. She used pictures from seed catalogues. Where are you getting your blank books for altering?
so pretty!! This would be a cute baby book cover too!
How lovely! I’m definitely going to do this!
omg these rock. they are sooooooooooooo much fun
Thanks for sharing and they are so cute. BTW, I love your mom’s dress, did she made that herself?
Thanks for commenting!
Mom didn’t make that dress, it’s bought somewhere a few years ago.
hands of a design is very impressive and different …thank you:)
This is one of those projects that, the minute I see it, I have to do it, like, immediately. I happened to be at the dollar store today and grabbed some cheap composition notebooks. They worked great and had the added benefit that I didn’t have to do anything about the binding edge – I just ran the paper up to the taped edge that was already there!! I think I’m going to use these as Christmas gifts – they’d make great teacher gifts. Thanks for the idea.
Fantastic! Thank you so much for sharing this. I’m on the hunt for a simple (yet creative) craft project to teach at my church’s “lady’s craft day” this spring and I think this will be perfect.
Hi, Hanna! I want to say, that this technique is very original and impressive. Useful for russian scrapers. Best regards!
Oh, Hanna, I can’t wait to work on this tomorrow. Your mom is groovy, too!
soooo simple ~ and soooo pretty!
When you mentioned that thinner papers work best, it reminded me that I made a handful of handmade papers that would work GREAT!
And I discovered the cheapest and BEST paper to use: newsprint! Many artists simply paint old newspapers, lol, so you’ve probably done that yourself! I used a pad of BLANK newsprint I found at a tag sale, for $1.
Thanks for the inspiration,
– vicki xo
Verry btiful!!!!A nice, intresting ideea.
WOO! So nice!
Oh, I remember this now! I remember pulling out all my papers and sorting them. There were thick papers, thin, cardstock, papers that have surfacing agents on them, papers with glitter embedded, patterned paper, plain paper, pink paper, black paper, and even paper with holes in it. Because I LOVE paper and tend to buy too much. So, I remember sitting down with these and sorting them all out. I put them in separate sections of my paper file. And now I realize I completely forgot to cover one of my hardback journals with them!
I know this long story may be boring, but sometimes I honestly can’t believe how easily I forget things or get distracted! Luckily, I have a long weekend again, and can play with papers all day tomorrow. (and sew them together)
Have a great weekend, Hanna!
This post is everything. Your idea makes me want to treat my hardcover sketchbooks the same way. It looks like I am late to the party, but I wanted you to know what a perfect idea this is. Thank you for sharing.