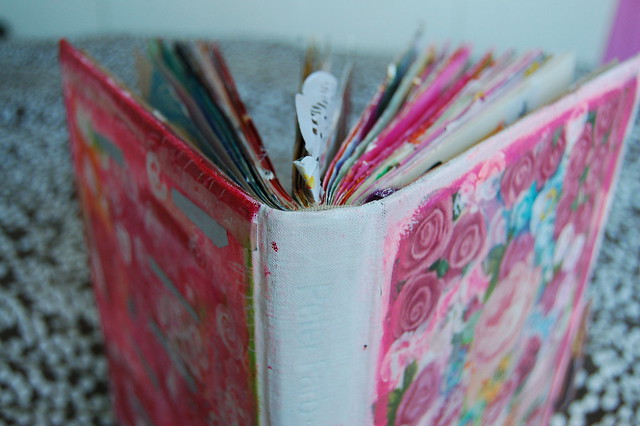
Altered book tutorial
It’s time for a tutorial on how to alter a vintage book and make it into your very own, personalized art journal! Altering books is easy and super fun, so let’s give it a try together.
Most of my Art Journals have been altered books throughout the years. I use altered books for several reasons, the most prominent reason though is that they are very cheap in comparison to artist sketchbook or beautiful handmade books found on Etsy!
I love cheap because the art journals is an important tool for me and one of the biggest reasons I’ve developed as an artist. I need to feel that I can use it without worrying. When the book itself is sturdy but cheap it’s easy to use it for “what ever” and experiment in it with collage, charcoals, crayons, acrylic paint splattering and painting layer upon layer.
An art journal that has non-precious papers is kind of made to mess up, and I will not hesitate to fill it with everything I want, even junk mail collages etc. That freedom is very important to me.
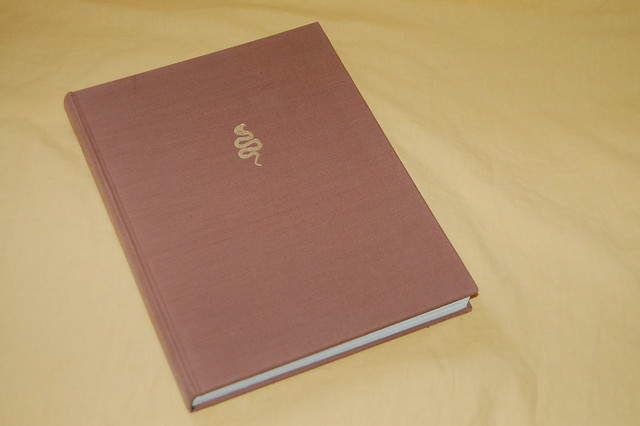
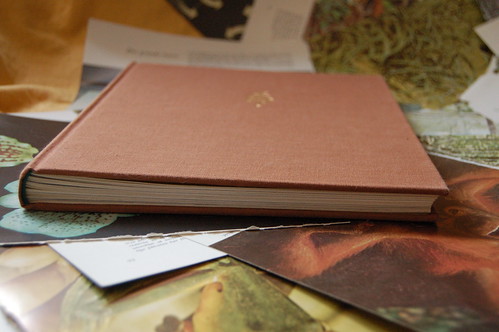
I get used books at flea markets or thrift stores. Personally I prefer coffee table sized books with thick matte paper, but you can use any style of book that you like. If the papers are to thin for wet media you can glue several pages together to make them sturdier, but to me that is too tedious and still does not give the best ground to work on. I prefer the thicker papers if I can find a book that has that (books from the 1970’s often has non-glossy & sturdy paper).
Tutorial on Altering a Book into an Art Journal
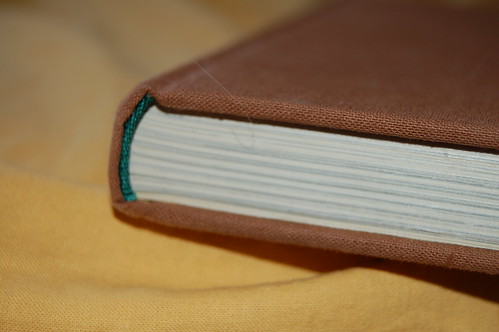
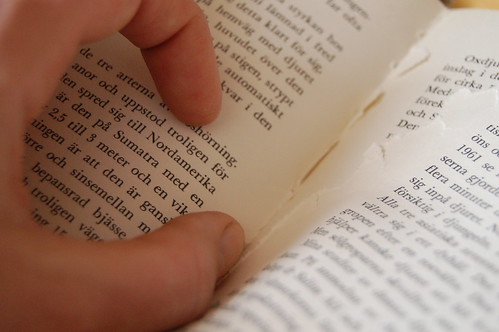
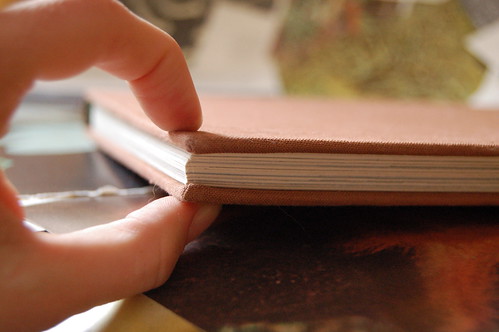
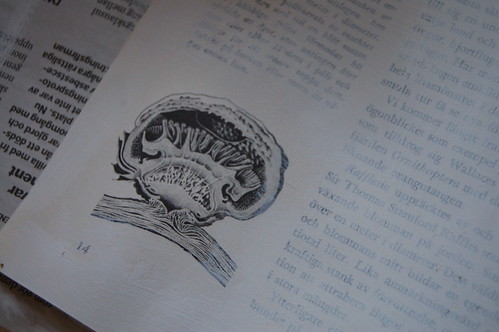
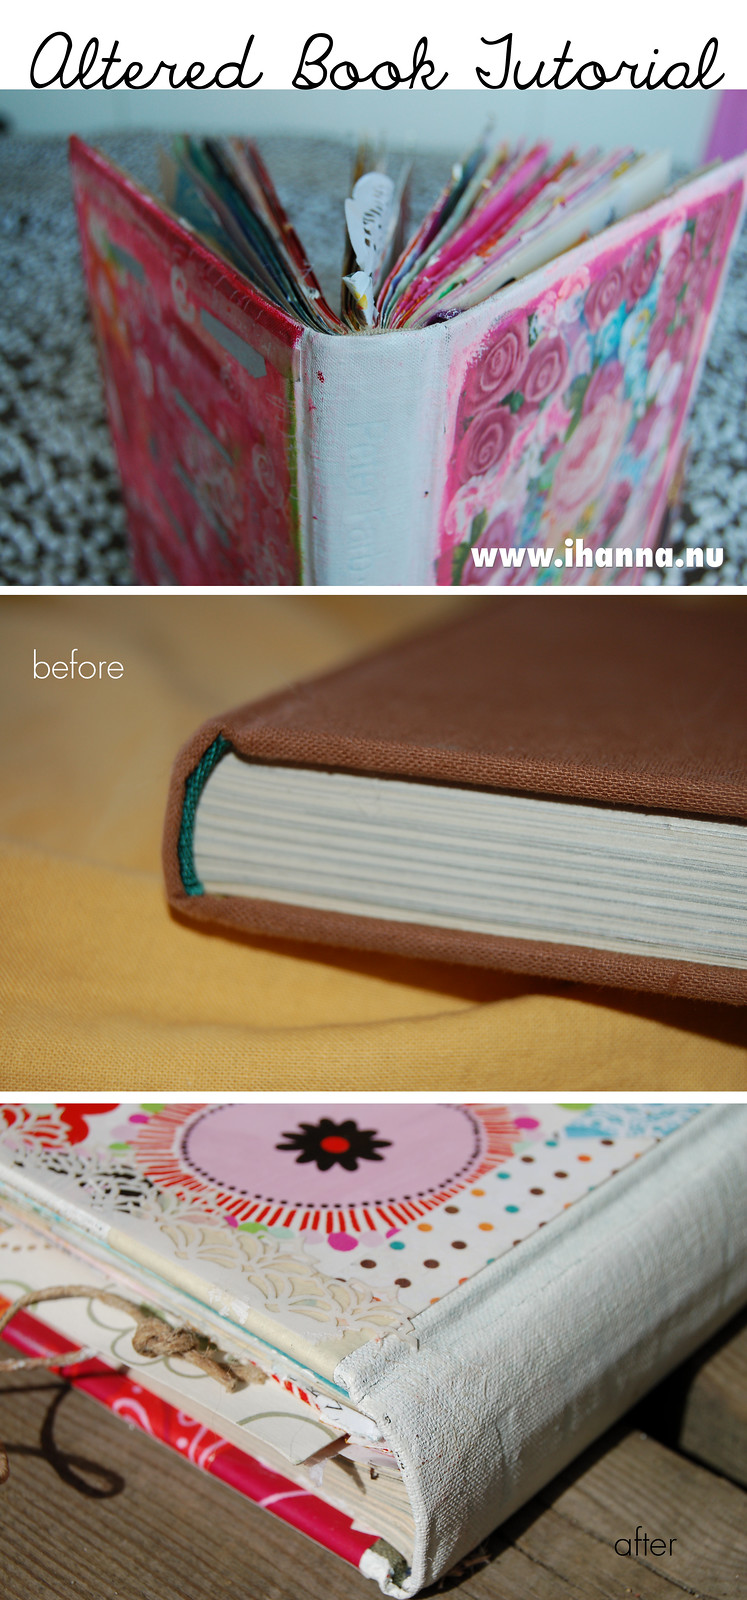
Before you buy the book check the spine. You want a book with a sewn binding, not a glue binding where the pages will fall out very quickly. Look for a book that has a rounded back and that is divided into signatures. In the middle of each signature you should be able to locate the thread.
On this illustrated page you can see the thread.
A sewn binding is much sturdier than a glue binding, and if it is a quality book it will keep together even when you “abuse” the book by tearing pages out, painting and playing in your altered book!
The first step is actually to start tearing pages out of your new book.
Find the middle of each signature and tear out about half of the papers in each signature, making it a lot thinner than it originally was. No matter how many pages I’ve taken out mine always ends up bulkier than it was in the beginning anyway.
I add lots of layers of paper collage and paint, and sometimes items like brads, paper clips and cardboard bits etc that adds to the book, so don’t be afraid to tear out a lot of the pages. It will ensure that the book will keep looking like a book a few months from now.
Of course when you use a book in this way some people will call it book abuse, but to me it’s recycling and very environmentally friendly. A whole lot better than if you use new sketchbook paper or if a text book like this stays in the thrift store to collect dust until someone throws it in the bin! I also save the pages torn out and I’ve used them to make envelopes, new journals, background papers or cut out the illustrations for collages!
When you’ve thinned out the book it’s time to start using it and make your marks on the pages. There are a whole slew of fun things to do to text book pages! You can play with the text and highlight words, draw on top of other illustrations or alter the illustrations for example. The only limit is your imagination. Just open the book and start playing!
If your book has cool illustrations you should keep them and work around them with your paints, integrate them in your world view or give them new meaning.
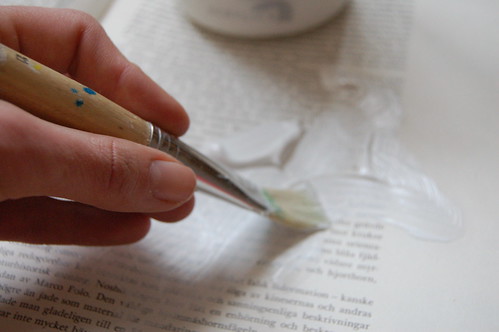
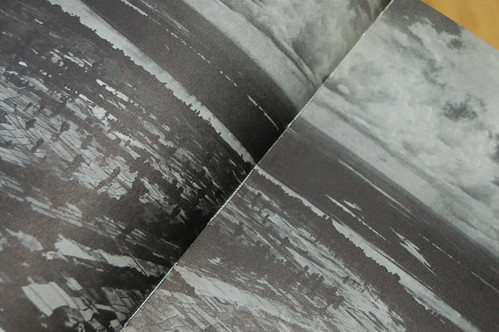
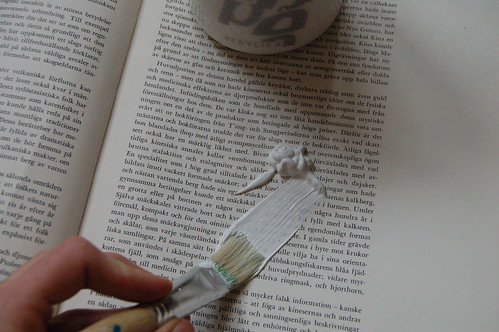
Sometimes (often) it is good to give a few pages a coat of gesso (that white canvas paint that gives the pages a bit of tooth and texture).
You should get gesso in big jars, because if you want to cover a text page you might need to paint it two or three times, but of course it’s equally awesome to let the text peek through, a layer of mystery from the original book.
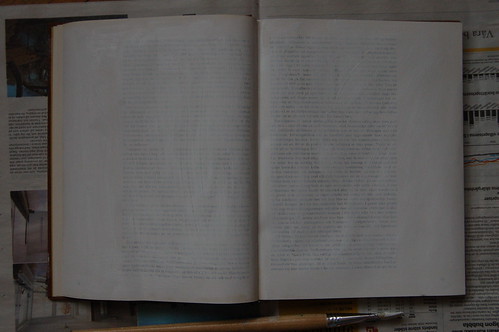
This is often what my page will look like before I start painting on it with acrylic paint to create a colourful background to write or add images on. Sometimes I will add just bits of collage papers before anything (not using gesso) and sometimes I will add other bits of text and then do a coat of gesso on top of that. I don’t have a 1-2-3 way that I always do, it depends on what I want to do and where I want to go with the page.
Gesso, gluing pages together, sewing new papers into the spine or altering the cover is optional! Let me know in the comments if you have further questions!
I’ve been altering books for years now
I love altering books. I love how compact and sturdy these books are. I find them easy to work with and yummy to look through. You are welcome to read more about books I’ve altered and used as art journals on my blog; altered ocean book, altered book cover with roses, the crow about journal and Altering the world we live in.
All of these posts are within the category art journaling. In recent years I’ve also bound my own books, those awesome books are found in the category book binding. :-)
Key word: experiment!
When you start experimenting you will soon find your own favorite method(s) of altering your pages! I’ve been asked several times about what kind of journals I use and how to alter a book, so I hope this post is helpful.
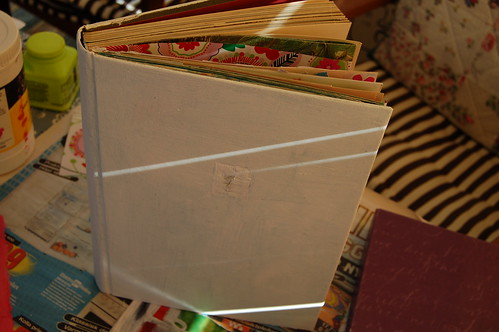
What you fill your journals with is up to you, though I’d love to see! Paint and decoupage the cover, write your name all over the first page and add things that you enjoy to the inside.
If you’re on pinterest just like me, pin the picture below (thanks!):
To see more fun examples on how I alter books click here. Also, since writing this tutorial, I have made a video tutorial: How to Alter a Book and make it into an Art Journal – watch it in case you want to listen to me explain all this and demonstrate it even better.
Let me know how your experiment goes!

Sigh, so great to see what you do with these books, I love it!
Have a nice weekend – Irma
Vilken häftig idé du delar med dig. Jag har inte sett det tidigare.
I did an altered book once – wish I had this tutorial at the time! I had several pages fall out. I think I should have checked the spine closer, or I might have laid on too much gesso on the inner pages.
What a great post. I’ve been making my own since I got into art journaling and art a few years ago, but I’ve not repurposed an old book yet, you’ve given me great tips on finding the right kind for the beating I give it. Thanks so much
Hi Hanna,
Thanks for this great tutorial!. For sure I’m going to try it one of these days.
Oh, I want to alter a book too!!!
(I must have a look out in the old barn, I remember seeing some books out there…)
Thank you so much for all of the awesome tutorials! Art sharing is the best!
I have understood, in my head, how this whole process would work, but seeing it laid out this way is fantastic. Might take my lovely daughter by the thrift store this afternoon to pick out a book or two to alter–I know she and I will both enjoy the task!
This is really useful, thanks for posting it. Your books are so pretty! I’ve always been a bit icky about ‘wrecking’ old books, but you’ve taken all the guilt away, just like that! ;)
I was just going through some old books…I found some I’d forgotten about…some that will make great art journals. Thanks for posting about this…I needed the reminder to use what I have and not purchase any more paper for journals….Can you elaborate in another post on how you do your covers?
Mary
Thank you for this wonderful tutorial, Hanna! I have been art journaling, but only on loose pages. I have a few of these books sitting around, so I can’t wait to get started. I think we are rescuing books and giving them a new life, not abusing them!
thank you! now i know , & will have a go. you’re the best!
Thank you for explaining how to use existing (published) books for your art journals. I have found a few “promising candidates” at recent book sales, and I now I know to check for sewn bindings. Thanks for the tip! Your books look fabulous!
i never, ever get tired of seeing your art journals! you gave me the very first inspiration to start my own and you continue to do so today, more than 4 years later.. i’ve been so, so busy as of late that i really haven’t found time to do anything in my art journal, but to see that you still carry on gives me hope.
beautiful stuff, keep it up!
love,
ingrid
Thanks for the lovely comment on my blog, I just stopped over to see yours and had to laugh. I just started my first Altered Art Book. Having lots of fun with it. Enjoyed your tutorial. Karen
Thank you for being so inspiring and for taking the time to share your ideas online – seriously, in lack of inspiration you are the first I visit! It makes me want to do things I never did in a long time, like altered books. What I have done for a few years is buy agendas/planners on sale – when it’s too late in the year to start a new one, and I keep them as “emergency” sketchbooks/art journals. I have 4 or 5 now, never used them, but I buy a lot of sktechbooks & journals for the future, to be sure I’m never out… Anyway, now I’d go to a thrift store to find a cute and old book on something silly and have fun with it. taking out pages is a great idea – first books usually have a lot of pages and to go thru them is just scary, but that way you have place for big collages and not that many pages to fill.
Off to walk the dog/laundry/make my 10 postcards now!
Hanna, this has been such a great summary. Thank you for the work you put into it. I have a small box of old books waiting just for that!! Gotta play with my kids first though before they let me play with my “toys”. (I better don’t show them yet what I will do to some of my books). And to me it is recycling as well. I also keep some kids clothes that are not good to wear anymore when I like the prints etc. Love working with those. You also inspired me to sew paper – loooooove it!!
Have a splendid weekend!
This was great information. Can’t wait to try it. I’ve heard of this on lots of other blogs but nobody ever took the time to explain it like you did. Thank you.
great post, Hanna! thanks for sharing your process. I’ve just recently become addicted to book arts (having taken a book arts class from Albie Smith at An Artful Journey last month…I’ve posted all the books I created at the retreat on my blog!). And I’m very interested in altering books like this too. My first thought was completing removed the original signatures and sewing in new ones with a heftier paper, but I like this idea of altering the original pages as well!
Excellent post. I had picked a small children book to alter but only made one page in it. After reading this post though, I want to dig that book out of hiding and start playing in it!
As always, thanks for the inspiration.
I really hope that one day we’ll get to create beautiful things together in person.
Hugs,
Sophie
Fantastic post Hanna, thanks for the information and tutorial. I have never altered a book. I have to get over the guilty feeling of ripping pages out of a book. You have given me the inspiration to try it.
Thanks
Lee:)
Thanks for this how-to. I’ve always wanted to do this but instructions that I find make it seem so difficult – yours make it seem that I can do it. Now to be on the search for a book with sewn-in pages.
Very inspiring and useful tip provided in this post.
I love altered book too :)
I have started many journals before this year, as you know I’ve wanted to have a journaling year for a long time, and now this is it! I have never bound my own book (except for a few pages, sewn in the middle with duct tape covers over cardboard). But I love little books on sale, journals no one did anything with. I got a bunch in a good size which were on sale and the more you got the cheaper they were. I was really happy, and knowing they weren’t fancy does help with getting started! However, I have been hesitant to share any of my pages. I showed some about a year ago in a book I never finished, but I felt so uncomfortable after I shared them that I stopped.
I may just send you a few pages. Or, I may get brave and put them on my site! So many things to blog about right now.
Thanks for this tutorial! Gesso Rocks!!
Okay, now you seriously make me want to start creating my own altered books! :-D I seriously need to take more classes in bookbinding/making and the such, this year.
Thank you so much for sharing this great and creative tutorial, Hanna. :)
Sometimes it helps to have a book that has been cut into shapes, to get over the natural inhibition, taught at our mother’s knee, to never ever “deface” a book. I find that once it has been cut it no longer stands as a book to be read, but as a canvas for creativity…
So I’m working on a teapot shape to fill with recipes for a friend right now… the shape often provides inspiration of its own!
Hi Hanna, thought you might like to know I referred to this tutorial on my blog, because I am starting to prepare an altered book journal based on it!
vilken underbar id?, jag som letar snygga skissb?cker i tid och otid, s?klart skall jag g?ra sj?lv. TAck
THANK YOU THANK YOU THANK YOU
Thank you SOOO much!
Sheila
I just found your tutorial today via Pinterest. I love how you describe altering books. I’ve been altering books for quite a few years and found out the hard way about finding one with a sewn binding. Some of my first ones are falling apart. But I learned something new from your post about taking some of the pages from the middle of the signature. I never thought of that. I just take them out at random and I think this will be better. I was going to repin your tutorial on Pinterest, but I wanted to ask you if it would be ok with you if I did. I’m off to explore your links to your journals.
Thanks for posting.
Blessings,
Tricia
Tricia, thanks for your comment on this tutorial, I appreciate knowing that you enjoyed it and took the time to let me know that it was of value. Not sure you can pin from my images on the blog, because flickr has changed the settings so now they don’t show up on pinning… but if you find it on pinterest again you could pin images from there – I don’t mind, just write “by iHanna” or something in the description. Thanks and welcome back to my blog anytime.
I’m using your method for taking out pages now and it is working so much better! Thanks again.
Blessings,
Tricia
Thank you for the great tutorial. Once I got over the tearing out of pages, I have been having a wonderful time drawing and playing in my new “book” I’ve found that the Derwent Inktense watercolour pencils, plus fine line markers have been great on the surface. I love how the images you leave in create a starting point for wonderful things.
Thanks again
Carrole
Carrole, thank you for sharing your newfound love of working in an altered book! I think it’s a great material to work with because it is so cheap & full of “starting points” like you say. Have fun with your journal!
Oh! I just loved those artjournals! Try the local library for new supplies. Sometimes the library sell books that noone longer wants to borrow. Library books are often better bound than the ones you find in the flea market, and cheap!!
And the librarians will be SO happy to know their “darlings” will be art, rather than to recycle.
I love this!!
If the pages in the middle of the signature have cool pictures on them that you want to leave in, you could leave those in and take out other pages in the signature. It shouldn’t make much difference as long as you take out pages that are made of one piece of paper – that is, opposite each other in the signature.
Now I’m thinking about how to make a “photo album” using copies of photos and cutting windows for them, with other pages for backing. Thrift store, here I come!
Hej Hanna!
Vilken fin blogg du har och vilka bra och inspirerande tips!
/hillevi
I just finished my first altered journal but I used a kids hard cover book, so the journal only ended up with 9 pages. I love that you used a thicker book and cut out half the pages. Thanks for the inspiration!
Awesome! Tip for when pulling out pages: Find the other half of the page you ripped out ( on the other side). The page is already half out and loose.
This is sooooo awesome!! I always wanted to have a scrapbook but I’m an introvert too and don’t get my picture taken that often. So this is kind of a way to have a scrapbook of what’s in your mind at any given time in your life.
Love,
Sarah
This is indeed an amazing project. Altered books is so much fun yet a good way to use old books so that they don’t end up in dust-bins.
Hi Hanna. A wonderful tutorial. Thanks so much for sharing. I too have been altering old books to use as art journals for some time. I take pages out too, to allow for extra thickness after adding paint/collage etc. You mentioned at the end of the tutorial that you sometimes sew new paper into the spine. I would like to sew some new paper signatures into the spine eg. watercolour paper, but am unsure how to go about doing this. If possible could you please explain, or do a tutorial on how you sew new paper into the spine/how to sew in extra pages to an altered book… so some existing pages and adding/sewing in some new extra pages. This would be greatly appreciated. Hope you can help she’d some light on how to do this. Thanks so much. Lisette.
If I were to glue pages together in each signature, should I start in the center of each signature and glue the two center pages together and then go to the left of the two that I just glued and glue the next 2 together and so forth? And then do the same with the right side of the two glued center pages? I hope I’m making sense!