Making a fabric journal cover
I’ve been working toward more book binding for over a year now, but it is a very slow process for me because it includes so many steps. First I started to decorate pages made from old envelopes and couldn’t stop. I have so many I will be putting together several awesome art journals this autumn. I have completed two so far.
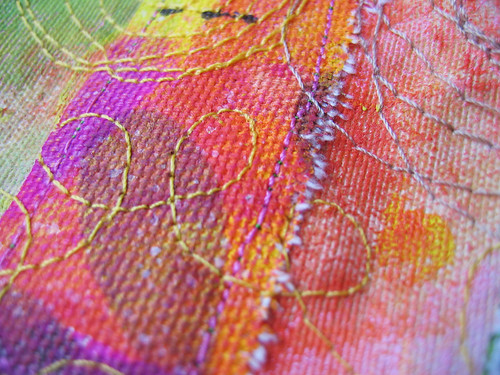
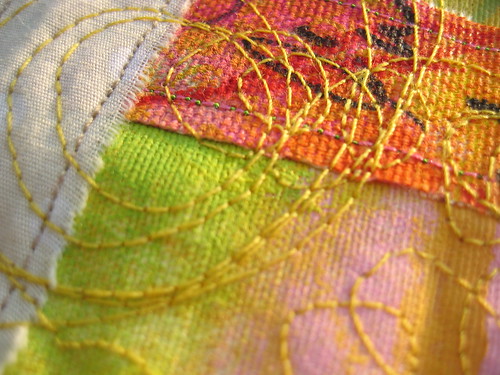
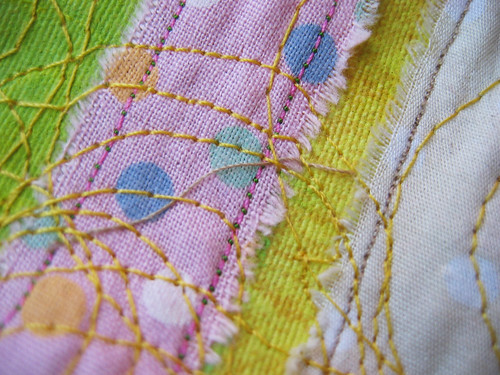
For this one I painted acrylic paint on fabric and then decorated it with appliqu� and ribbons. I did a lot of free motion sewing and broke the sewing machine needle several times. I think it’s because I move the fabric too quickly, and then that makes the needle break? I hate when that happens. It’s like you’re in a fun flow of creating and then snap! you can’t continue any further. But once finished I love the look of this little piece of cloth!
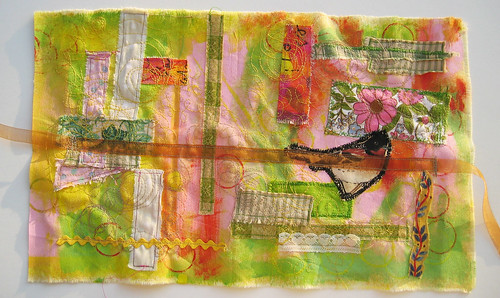
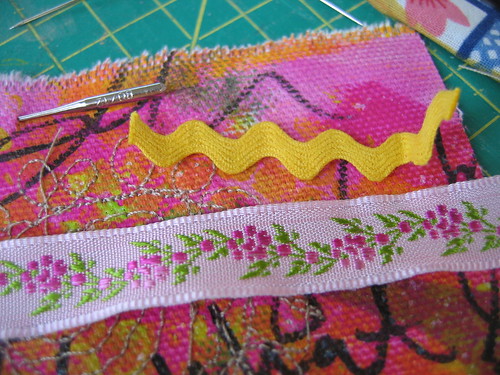
I have appliqu�d the cover with both my own painted fabric, tea dyed fabric, lace, ribbons, and some pretty patterned scraps of fabric, including a bird. From one short end to the other I’ve fastened a brown organza ribbon that you can use to close the book with a bow. I really like that concept and will from now on add a closing ribbon to all journals I make, and perhaps a few of the ongoing ones. For those already started all you have to do is drill two small holes on each cover and tie a ribbon to each side. It’s so much easier to carry and handle a bulky growing book if you can close it securely.
It’s important that your cover is a non-stretching cloth.
Anyway, love free motion sewing when the sewing machine is cooperating and not killing a needle every minute. I create the pages for the book first. Once that’s done all you have to do is attach the book block to the cover and glue the two together.
While this isn’t a from start to finish tutorial I thought I’d share this photo with you on how I make my hard cover journals. This is how I attach the fabric to card stock to make a sturdy cover:
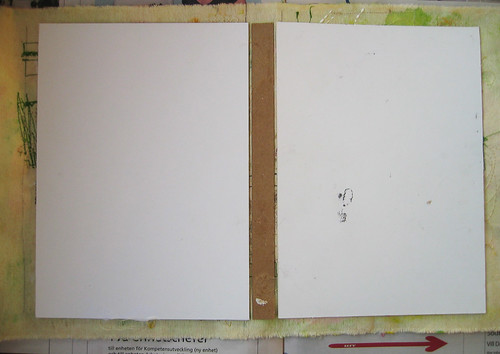
Cut two cardboard cover boards out of a solid, heavyweight matt board. Framing stores carry this type of cardboard. I got mine at a book store that sells office supplies too. A cheaper option is to use the cardboard backing sheets of two pads of paper that you already have at home, but my boards are a little thicker than those usually are.
The cardboard cover boards are then glued to the cover with a thinner piece for the spine in between. The spine should be as long as a page and as wide as all your� pages sewn together.
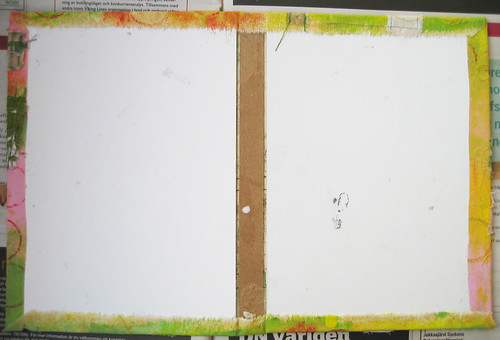
I use white craft glue, but there are special book binding glues if you get into this hobby. If you’ve made sure your cloth is larger than the actual book you will be able to bend the edges to the inside and glue them down there.When this is dry you add in the pages. I don’t sew the page to the spine, I just glue the end pages to the inside of the book covers.
I really like hard covers because they protect the pages much better than soft ones that many others make. I like how its protected when I travel with it in my bag. I like the way you can line these books up on a shelf, or create with one laying on my knee. But, like I said, I’m making several journals right now and this is the first one to be finished. It will be up in my Etsy Shop in a few days I hope, and if you’re in my newsletter you’ll be the first to know!
I will show you the finished book cover and the inside pages in� my next post.

Hanna, I have started art journaling. !!!!
It’s all because of you, really. For years, I have been amazed by your journals and I always had that little thing in my head to get past, the one that told me that the journal had to be PERFECT. Because, so many times in just my writing journals, I would rip out pages that weren’t neat. I stopped doing that when I started the morning pages earlier this year (again, thanks to you; I still do them occasionally).
Then, on Pinterest, you linked to the journal with the vertical columns. That was it. I’d had enough of NOT art journaling. So, I’m on my second day and I look forward to every day forthcoming. I started with the column idea because it’s not overwhelming, but I feel confident moving on from there.
Also, the posts about doodling helped me out a lot too.
So, none of this has to do with this post in particular, which is amazing, but it’s just a big THANK YOU!!!
WOW – I have a sewing machine (vintage) but i’m clueless! Love the look of freehand sewing and always wish I had the guts to try it with paper. Your work is super lovely and the colors speak to me as well!!
Seems like we’ve got lots in common. Photography, morning pages, art journaling, book making and i have a real true love of teaching. I haven’t organized anything on my blog into “tutorials” per se, but I love to show a WIP and see the magic unfold. Thanks for taking the time, it’s appreciated! :D
– vicki xo
hi hanna, thank you for the tutorial, it was very clear & comprehensive & answered some questions i have been wondering about. i am going to make a cover your way.
Oh, this is so beautiful… thank you for sharing your tutorial.
Can not wait to see the outcome :]
Love,love,love this sooooo much! Beautifully done, and I will try this….Oh, check your tension on your stitch or adjust pressure foot for thicker fabric??? I break needles all the time when I change from light to heavier fabric.
Well you have sparked a fire under me that is forsure! I will be reading this over & over, you can be sure…….Thank you very much…love & light Debi
Beautiful journal cover, Hannah. I love the look of your freeform stitching. Lucky you with all those journals to make this fall!
Wonderful colorful covers. I love them. And yes, somebody should really invent unbreakable needles, I’m sure every sewing machine user would be willing to pay a little extra for that. ;-)
It’s a wonderful cover… I learned to makes books like these when I was at school. But we used plain fabric for the covers… And… by the way… my little animals are a 365 days project. I started on august the 4th and sometimes I make books (one-of-a-kind) and will use them for those or maybe… I’ll make 365 Atc’s… I just don’t know yet… First I have to make all 365!
So colorful and pretty!!! Love the stitching!
Yes you inspired me to journal, too!! I love your yummy texture cover and stitching. Show more soon!! xox