Tutorial: How to make a Mosaic Covered Flower Pot
I’ve been wanting to make something with mosaic for ages, and this summer I finally found both the time and the place. And the material, some coffee cups featuring lovely vintage roses!
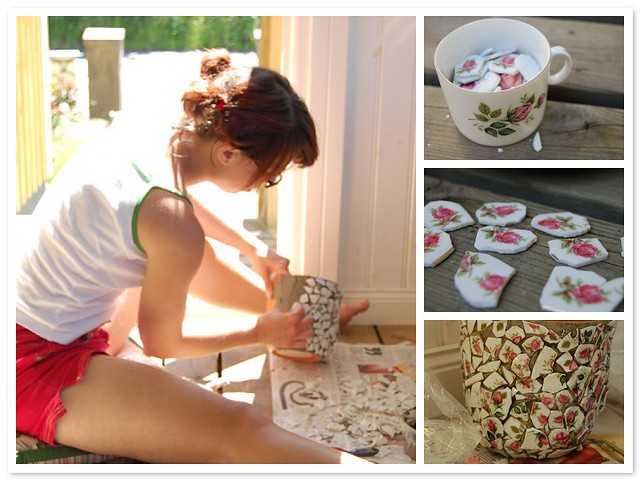
I decided that my first project should be to cover a flower pot with pieces of broken porcelain, using the rosiest of pieces. While making it I took some photos, so here is a quick guide if you want to try this craft too!
How to make a mosaic covered flower pot
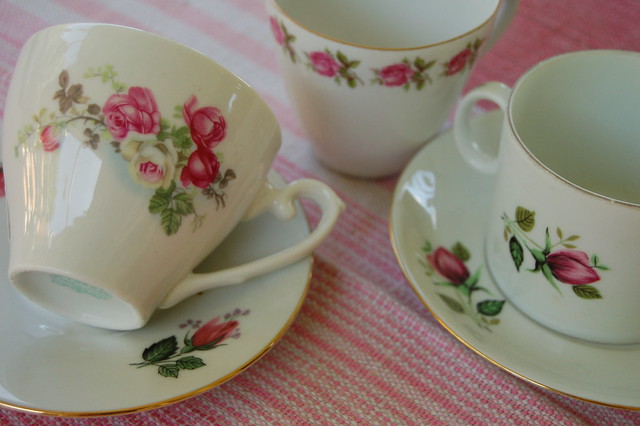
1. Find the china you want to use.
I thrifted a couple of vintage cups with different kind of rose prints, plus the plates for them. I found mine in a favorite second hand shope for 3 SEK each. This find was also the beginning of my rose cup collection (I kept two).
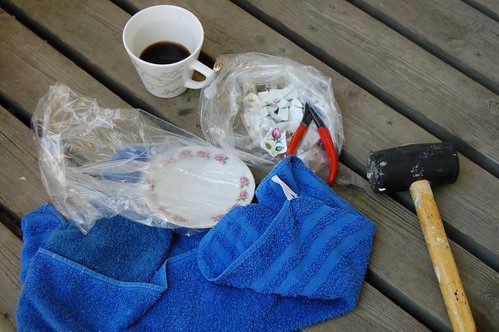
2. Hammer away, and break the cups into small pieces.
I sat outside and put a cup at a time in a plastic bag wrapped in a towel. I used a rubber hammer, and made a couple of hammer-blows to break the cup up. Then I used dad’s cutting pliers to cut away the white surrounding the roses and nibble at the edges where I thought it was useful.
Don’t forget to drink your coffee and protect your eyes all the time while you cut.
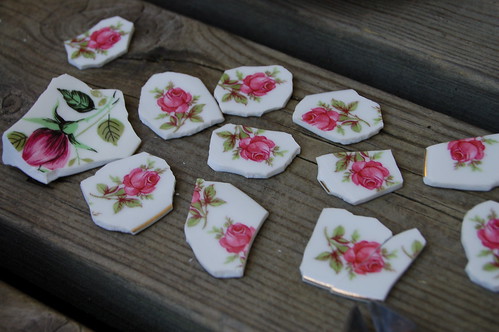
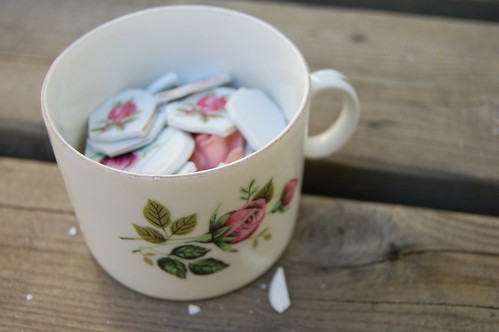
3. Collect the patterned parts to the side, and keep the rest in the bag.
I just lay mine out to admire them, they looks so beautiful together – and I took lots of photos of them before I even used them. Don’t you just love when the material is making you happy before anything is used even?
4. Mix the tile adhesive
I used one that is actually for bathroom tile setting – it looks like cement. It should be a bit thicker than it says on the package.
5. Add the cement in chunks to the item you want to mosaic.
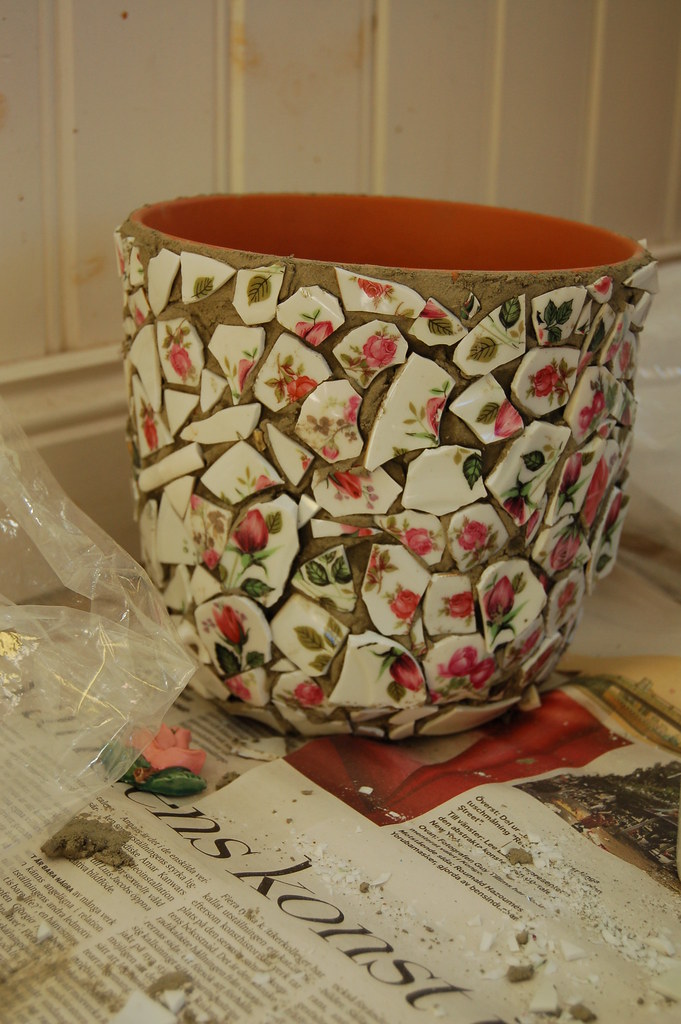
I took a thrifted flower pot, and added the cement as I went around the pot.
6. Add the china mosaic pieces
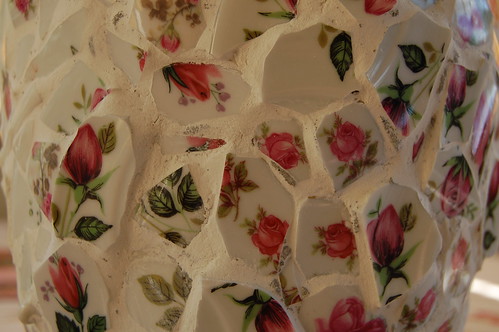
I started with the rose pieces and made a “front” and then also a “backside” (which has more of the white pieces). I added very thick pieces from the plate, that made my pot buckled and uneven, but I kind of like it like this, it’s very artistic… If you want a more flat surface you should sort out the thick pieces first or make mosaic on a flatter surface like a mirror frame or table.
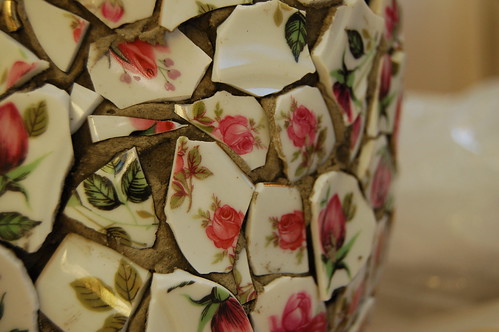
I also made another mistake: I put to much cement onto the pot so the mosaic sunk into it a bit to much. This made my finished surface a bit gray, so don’t let the grout “stick out” between the pieces if you want to avoide this.
7. Mix the grout, a white powder (or coloured) with water before using it. Then add it to the surface.
8. Smear the grout on top of everything and make sure the holes between the tiles are filled.
9. Clean it of. After this has dried for a while (5 minutes) go around the whole pot with a wet cloth and clean up the mosaic pieces from the grout. You have to do this again in 30 minutes with a damp cloth, so the tiles shine. Then let it dry properly.
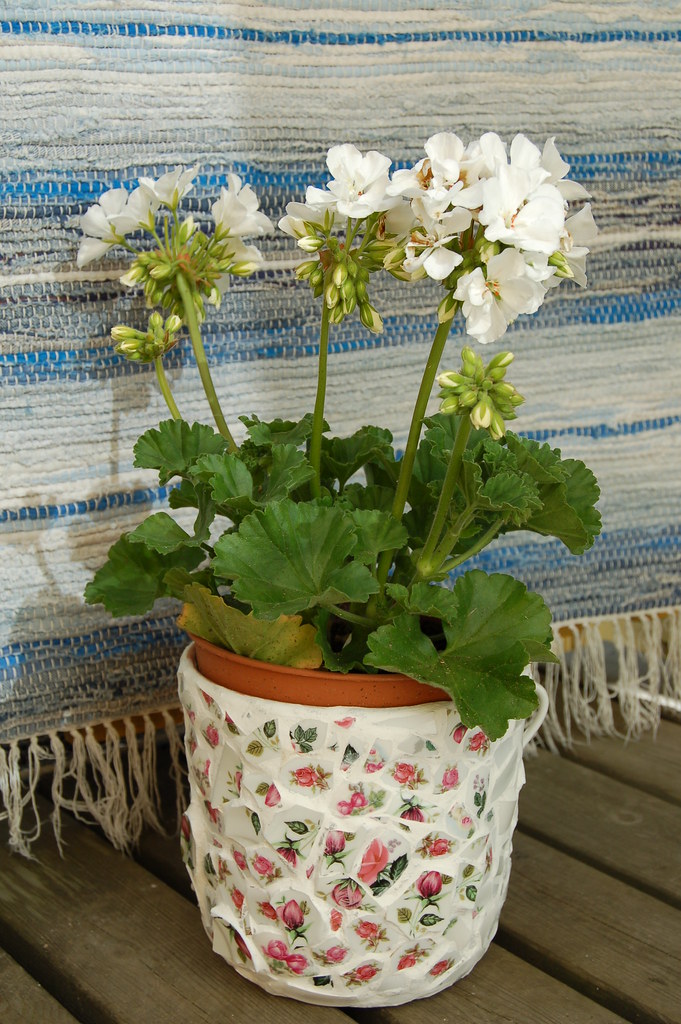
Ta-da!
Enjoy your finished mosaic flower pot.
I know I will enjoy mine for many years to come – and make more mosaic too when I have the opportunity. I have more rose cups at home, that I don’t want to use. Plus a whole big box of glass tiles in blue and turquoise that I found at a flea market last year. I just need the right furniture piece for it – a table would be great. We’ll see what happens, I’ll keep you posted.
I highly recommend you to try mosaic, it was really fun and I love the result. Good luck if you try this, and let me know how it goes.
PS: Also check out previous craft and art tutorials and feel free to subscribe to my newsletter, and I’ll let you know when new and awesome things happen in iHanna World.

its been so long since i did a mosaic ~ this has me wanting to pull out the hammer and begin the process. really beautiful pot : )
That is so marvelous! Thank you so much for the great tute!!! I think I just may…. hopefully… make a little somethin’ something soon!
Wow, I’ve just learnt something new today! Now I need to find a teacup.
Clara
This is great Hanna! It turned out beautiful!
What a beautiful pot this is! I just love all those rosebuds. Can’t wait to see your tiled table in future!
Wow, I am so happy to meet you in the blog world! Your blog is amazing! I feel I have a lot to find out…can’t wait to read all your blog!
I love this mosaic pot a lot! Wonderful job!
What a great tutorial, i have the feeling immediately doing it ;)
Beautiful!
?h s? vackert!
Hello, I went to our local flee market on Saturday, with the intention to by china for my mosaic project and bought some really good porcelain/china for 250 SEK altogether it included 8 porcelain cups and 8matching saucers in the most beautiful dark green with a gold trim. 6 porcelain cups, 7matching saucers, and 6plates with a rose chintz design similar to your pot. 4 porcelain plates and 3 matching flat bowls in blue rose design. Heavy! But I had my husband with me (heh heh)
The green set is so attractive I have not broken them yet :)
Anyway looking for inspiration I came across your beautiful pot it?s really pretty.
I too will also try furnisher more than anything, especially with broken china, but for now I think I will start with a box.
Good luck with your dream!
Patricia
May your hands always be busy!
I love this! I’m totally addicted to broken china mosaics and now I sell broken china to fund my addiction. Check out my art at my website.
http://www.manicformosaics.com
Check out my mosaic tiles hand cut from antique, vintage & new china!
I just started to mosaic and LOVE it. Your pot is beautiful!!!! Could you please tell me what 3SEC is in US dollars? I am just curious how it compares to our prices. Thanks in advance. Karen
Thanks for all of your comments!
Karen,
3 SEK is Swedish Crowns and if you want to know how much that is you can go to google.com and type
3 SEK IN USD and then press search and the answer will be there! Try it out, I use it all the time. Thanks for your visit, did you see the most recent creation, my mosaic table too?
Oh my!
Nice Leg… lol
This is such a lovely idea! I have a bunch of old porcelain tea cups from different sets that are really useless and would look great as a mosaic on some pot. My girls will be very interested of this recycling project and we will definitely have a great time together. Thank you for sharing the inspiration!