I’ve tried glass fusing for the first time in my life, with the helpful guidance of my more experienced friend and crafty sista Maria. The materials she has in her stash is breathtakingly beautiful and fascinating!
Look:
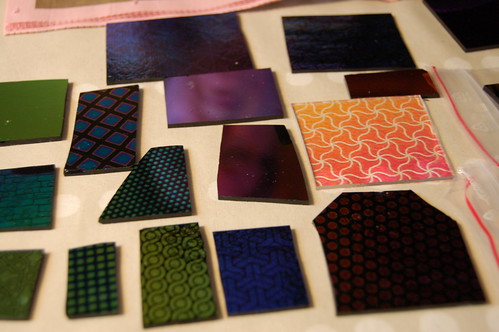
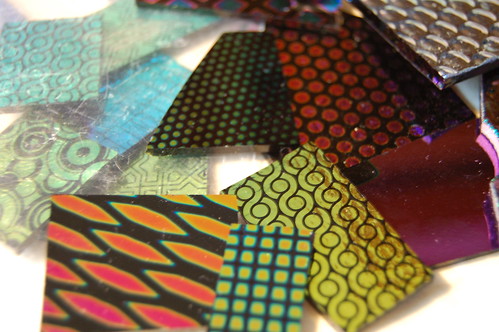
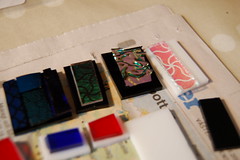
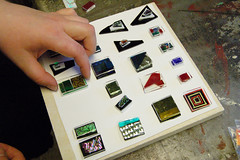
Material for glass fusing with different colors, pattern and metallic sheens to them. I was amazed by the different patterns of dots, stripes and swirls that these glasses have. It’s a costly hobby but Maria has built it up for a while now, and she is also selling her beautiful jewelry!
Maria showed me how to start, and I took photos while she did:
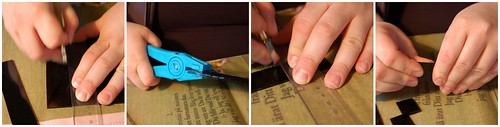
1. Score the black background glass with a cutter filled with oil to make it run smoothly (though we used dish soap and water)
2. Use a tongs to break the glass into a row and then
3. use your ruler to score smaller pieces that you can then actually break using your hands (4)!
These black pieces becomes the foundation (canvas) to play on when combining colored glasses or metal patterned glasses in different ways!
I started out with a white background and added tiny left-over glass corners:
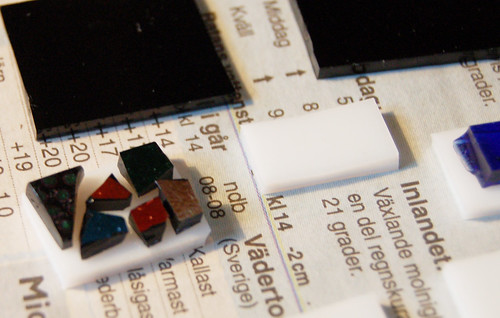
Kinda look a bit like my style?! Mosaic scattered around; can’t decide what color to use… hehe.
 Making glass jewelry is difficult because as a beginner you have no idea what you’re doing – or what you’re getting! I was lucky to have Maria as a teacher and adviser, and also got to look through her pile of finished pieces to see what was possible to make. That helped me make some choices about size and combinations as well as copy some of her designs that I liked.
There are no rules or patterns to follow which makes glass fusing creative and easy enough, but on the other hand some of the factors that affect the finished product are difficult to master! You have to… yes, as always… practice! You’ll get better results with experience I think. The glass will melt in the oven as it pleases, dependent on heat, air bubbles, time, color, size and treatment with lye.
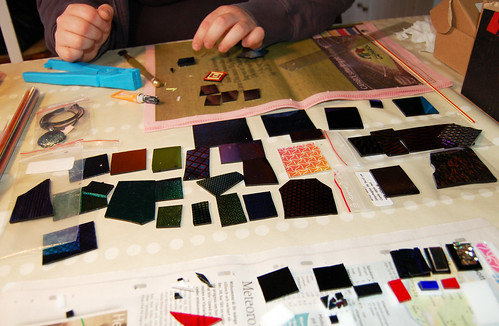
Our working table. Yummy stuff, great day!
I glued the mosaic in place so that they wouldn’t fall of in the kiln (burning oven), but on bigger pieces you don’t need to glue down your designs. You do need to cover each piece with clear glass though;

The clear glass is placed on top of the sandwich and this makes each piece melt together evenly and creates a nice surface (hopefully!).
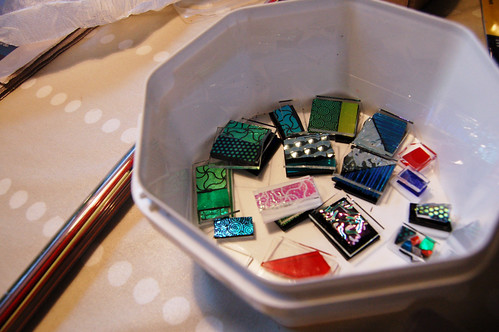
Finished for the oven and gathered together in a ice cream container to be carried out to the garage.
The kiln at Maria’s parents is the smallest I’ve ever seen, though clumsy with extremely thick walls. On a specially bought surface we arranged each piece (not to close to each other) and then placed it inside the kiln carefully not to have any glasses slide around.
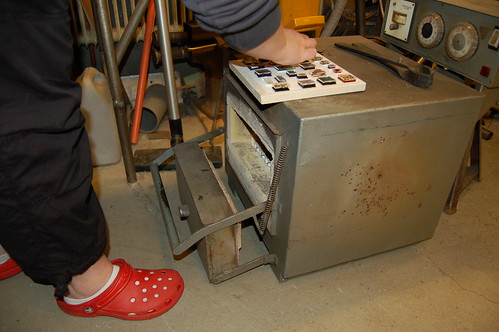
Not a big space, huh? Then we had lunch, knitted some and watched TV for two hours before turning the kiln on – but we had to wait until the next day before we could see the result (the kiln is 800 degrees hot so it’s advice not to open it straight away!). So we had to wait, and so do you!
I will post photos of my finished pieces tomorrow!
I want to try everything crafty at least once in my life. I might call it a goal I’ve set up for myself, but it’s more a wish and a drive I can’t stay away from. So last year when my friend Maria learned how to fuse glass I got curious about it of course. I’m grateful to have had the chanse to try this without paying much for material or going to a class! When I’ve tried something once I seldom feel that I’ve had enough so I might try this again if I get a chance!
More information:
Read more about this hobby at About.com: Get Started: Fused Glass.

How cool! I can’t wait to see your finished pieces!
You are so inspiring, the way you explore so many different forms of creativity.
Isn’t it great when you have people who can walk you through the process of a new technique?
I can’t wait to see the finished pieces!
*hugs*
Sophie
*sigh* I SO want to learn some kind of glasswork! I figure it will be lampwork, though, since I can’t afford a kiln, lol!
Can’t wait to see your results!!
I’m with you there, I’d like to try pretty much everything. That stash of glass is awesome. Definitely better than what I see at the local Hobby Lobby. Can’t wait to see how they turn out.
That’s so cool. They sell fused glass jewelry at craft fairs here and I always wondered how they made it.
I see exactly what you mean, I want to try all crafts too ! I just took a weaving lesson, and it was great, another idea to use my scraps of fabrics.
That seems like so much fun! I was at a tour on Konsth?gskolan, and i visited their glass-workshop. It was so exiting! All the beutiful stuff and the amazing techniques…
I would love to try it sometime, but I dont know where to find a kiln. Or the other materials for the fusing. Perhaps there’s a course somewhere that I could take…
Good luck with the goal!
You created some very nice pieces. I can’t wait to try this again. The technique is a lot of fun.
[…] I’m always interested in trying something new for the first time, especially when it has to do with art and craft. During 2008 I’ve tried a few new to me craft techniques. I’ve tried glass fusing, which resulted in beautiful necklaces and great gifts. And I’ve tried felting fleece in water. You can learn how to felt easter eggs from me, but I hope yours turn out better then mine. I haven’t laughed that hard since I made those ugly eggs so it was worth it. Felting with water and soap by hand takes a bit of practicing. […]
[…] Glass fusing […]