This is part II of Making a Quilt, read part I first starting is easy.
I’ve decided on the background fabric! It’s white cotton with green and pink checkers that I found at the thrift store. I have a huge piece of this fabric, 5 meters I think. When we come to this part you kind of see how the quilt will look eventually, though putting it together is a stretch, both for the cat to stretch on and for my patience with my little helper;
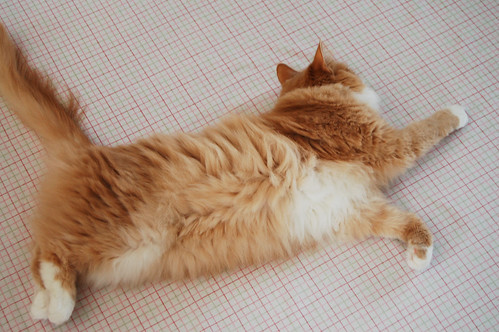
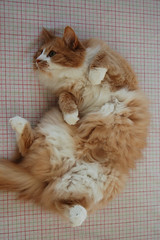
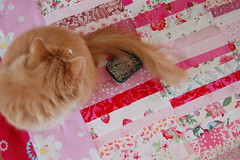
What is it with cats and fabric on the floor?
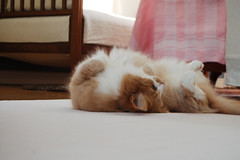 The second I spread this out she was in the middle of it rolling around, looking oh so innocent! Earlier when I was laying out the fabric stripes (to get a mental picture of the quilt) she dived right into everything, head first. The pieces was whirling through the room and I was laughing so hard while telling her what a obnoxious little cat she is. I lay them out again, and she jumped in. I don’t know anything else that gives her this instant happiness boost! We were playing like that for quite a while until I scoped her up and away from my newly ironed fabric pieces.
Time to work!
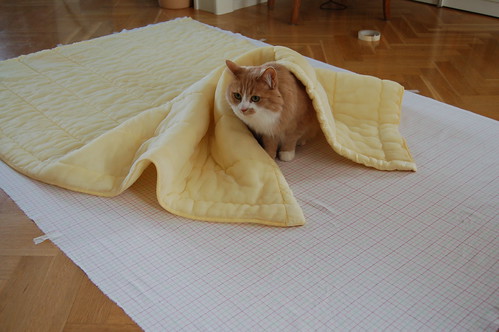
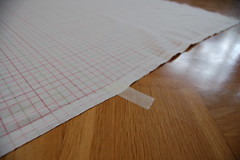 This is the part of quilting when you need some space to lay everything out and stretch it before pinning it together. I started with the backing fabric (print down) and taped it to the floor.
Then it’s time to add the batting on top of backside fabric. My batting is a thrifted bed blanket found in mom’s stash. Many of the fabrics I’ve used in the patchwork is also thrifted of course, that’s part of the game for us. To find beautiful fabric – that is cheap!
All layers thoroughly investigated by Smilla and she states: there is nothing wrong here, you can carry on with your business!
Isn’t she cute?
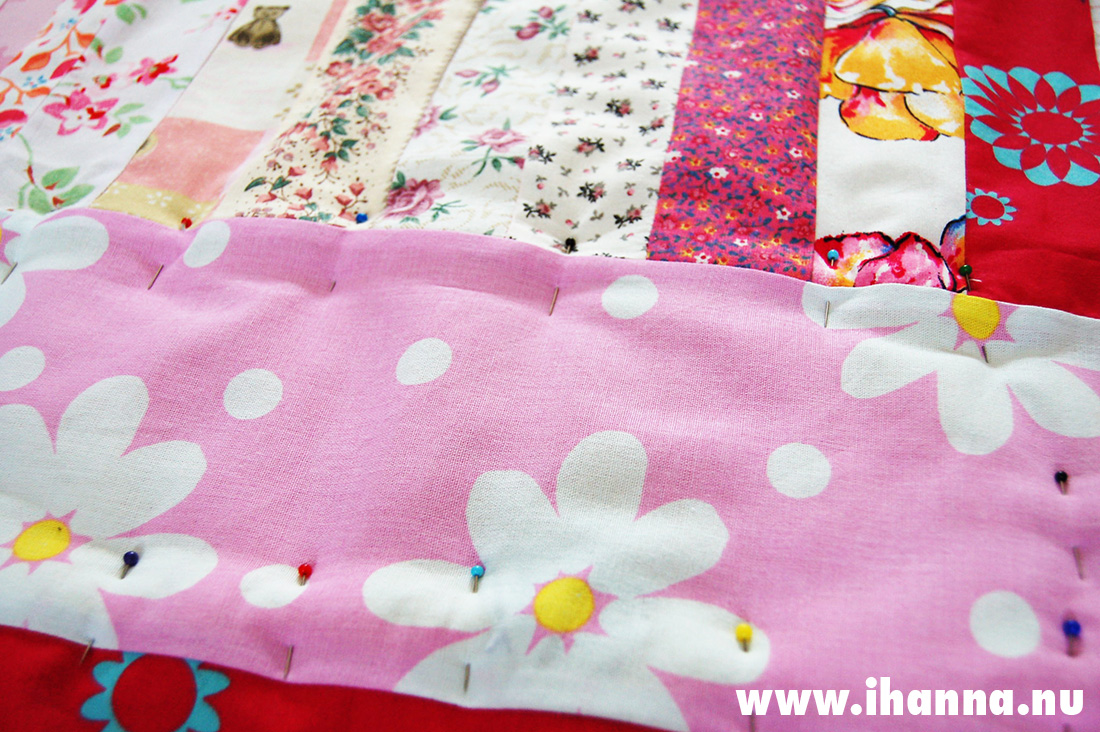
And then finally, the third and last piece of the puzzle;
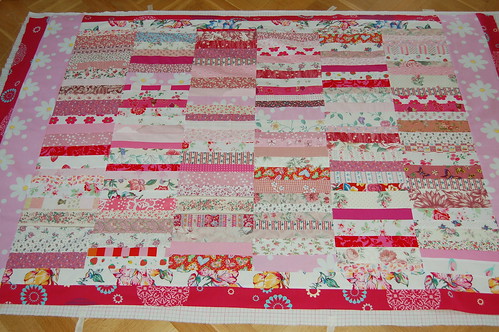
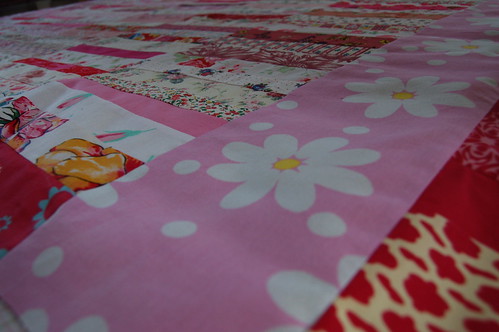
All those beautiful fabrics sewn together into a pink patchwork!
Isn’t it glorious in all its splendor – or something like that anyway. I had so much fun sewing all these stripes together one after the other!
 Now comes the part where you crawl around on the floor with your tin of needles and pin all the layers in place without wrinkling anything. You tack the three layers together with quilting needles (also called Betweens), and while you do it you can remove the tape too.
Most of the fabrics I picked out are flowery and romantic but there are also very modern fabrics and bold colors to make the composition interesting. I love this quilt, and now the only part left is to sew the layers together on the machine; that part is what they call Quilting. I usually call it “Time to Mess It Up” or “Destroying the Patchwork Part”. That’s because it is difficult to quilt, especially a big blanket like this one on a regular small sewing machine. It will get wrinkly! I know that I need to embrace the wabi-sabi in that, but it’s difficult at first when I sit down to make it beautiful. I sew, then rip the seam apart just to sew the fabric together again… I need to remember that with three layers its a thick quilt that will warm me many times – I’m not making it to hang in a gallery!
After a while thought, when I come back to my quilted work, I will love it again and be proud. These things take time, as I said in my last post. Not only does it take time to cut, sew and design it – for me it takes time to process it and let it rest in between working with it.
Read the next part of Making a quilt too: Adding the edge and finishing.

It will be absolutely gorgeous! And Smilla is cute, as always! *^v^*
It gorgeous! You are amazingly productive with your arts and crafts.
I am in love with this quilt…
I have made one quilt out of old t-shirts. It came out nothing like I had pinned it, but I love it just the same.
Fabric arts and I have a complex relationship at best. :)
WOW!! This quilt is so beautiful, and cheerful, and elegant. Smilla clearly can’t wait to lounge on it!
What a pretty, happy quilt! Your fabric selection is so fresh. I love it!
gorgeous quilt. I keep telling myself I will make a quilt but so far nothing.
(ps. it’s the same with kids and fabric on the floor, especially the under 3 crowd)
Fint lappt?cke!!
So pretty! I love how you used so many different fabrics.
Beautiful! I think cats are secretly crafty. They always seem to be attracted by what we’re working on be it painting, sewing, knitting, paper crafting… Diesel is just as bad as Smilla for that.
*hugs*
Sophie
i know how you feel with your cat getting in the way. my cat loves to attack my hands while i’m painting or drawing on the living room floor. its funny but keeps you from getting any work done. i love the colors you chose for the quilt. i also love to sew but am not very good at it… ive just come to the realization that the crooked seams and unfinished quality is what makes it creative and beautiful!
Your quilt looks to turn out very nice. Lovely fabric and lovely colors! And very much your colors.
I don’t think I’d make a quilt for myself in pink, but we’re all different and I admire people how go others paths than me. ;-)
About quilting the thing: I just HATE it when the layers go this and that way. I dislike it so much that I’ve started contemplating handquilting my projects if I want them to be perfect. Now – how’s that for a lunatic?
Smilla looks to be a cat of the kind we adore – loving and playful. A joy to the home. :)
What is is with cats and ANYTHING on the floor..they always have to lay on..especially if you are using it. A book, a pattern, wrapping a present…and esp boxes that are way too small for them lol!
Lovely quilt..it’s so cheerful! That background sounds perfect!
The quilt looks lovely. My dog use to do the same thing. I could never cut out fabric while she was in the house.
This is going to be one beautiful quilt! Thanks for sharing the process and the cute pics of your cat. She is quite charming, I’m sure she thinks she’s helping. ;-) Good luck with the machine part.
Hi Hanna,
Your Smilla is so pretty :)
I envy you; I’ve only made two quilts but I’m hooked already, except now that I’m Korea I’m without a sewing machine (and I’m still looking for a fabric store). My favourite part is laying out the pieces to see how they should fit together! Can’t wait to see what you come up with.
Tere
Gorgeous quilt, Hanna! I really enjoy seeing your beautiful work, especially your daily art cards. You are so productive with your art. I wish I could be the same!
Your quilt is perfectly lovely….as is Smilla!!
I have a collection of souvenir dishtowels that people have given me over the years and I plan (at some time in the future) to make them into a quilt. You have given me some inspiration to dig them out and see what can be done!!! Thank you …as usual a great post!!
S? l?cker quilt!
A walking foot attachment will help keep the quilt from wrinkling when you sew. It has feed dogs on top. and the machine has feed dogs on the bottom so they work together to push/pull the mass of the quilt under the needle. They can be purchased or borrowed from someone with a machine like yours.
[…] This is the third and last part of The making of a Quilt, a bit of a tutorial and a bit of documenting the process. The other parts in this series are 1) The making of a quilt – Starting is easy 2) The making of a quilt – Sewing it together plus some thoughts in 2?) a drink in the veranda […]
Its really nice, i love those colors and flower designs, very creative. I love to collect colorful fabrics for my room and couch but really collecting is only what i do… i never do have time quilting anymore… but i do appreciate quilting just like your work..
You have a lovely work… this is a very nice quilt..